Beginner's Guide To 3D Printing

3D Printing. It's a beautiful thing that allows you to bring your imagination to life. There's a few types of 3D printing methods, but we'll be focusing on FDM (Fused Deposition Modeling) in this guide, although some aspects can be applied to most 3D printing methods. Your prints can be as simple or as complex as you like, although I prefer to keep them simple where possible.
Where do I start?
Firstly, it's important to understand that 3D printing requires patience and has a relatively steep learning curve. In summary you need to learn a bit of CAD, be hands-on and ready to make mistakes, and have the patience to test out different settings to get optimal results. Unfortunately there isn't a one-for-all solution, although that would be great!
Hardware
Finding a printer
The market has evolved since I started 3D printing back in 2019, and my first purchase was the Anycubic i3 Mega S, which is now considered an older model and has been replaced with the newer Anycubic Kobra range. They have newer features, better firmware, and are supposed to be built better. I've made some modifications to mine to get the most out of it, and I've successfully managed to get good quality prints out of it.

For an entry level printer, the Creality Ender 3 V2 is good, or the Anycubic Kobra. They both have a build volume of 220mm x 220mm x 250mm which is more than enough when you're getting started and bigger than the current one I have. If you want to get a bigger one then you'd probably go for the Creality Ender 5 which has a larger build volume of 350mm x 350mm x 400mm.
If you want to look at a more detailed comparison, All3DP have got a great article on the top 3D printers.
Setting up your printer
You should set up and assemble your printer as per the manufacturer instructions - they will usually come flat pack and require a few screws connecting to assemble the frame and a few cables for the sensors, hotend, and extruder. You can then connect it to a computer/laptop with a USB cable, which may or may not be provided with your printer.

You may have been provided with an SD card with your printer that will contain a test file - you can follow the instructions to print this test file and see what results you get. This will be a baseline to then fine-tune to get optimal printing results.
Material
There are many types of filament available, with the most common being PLA.
You need to ensure you have some PLA filament to print with. I personally use eSUN PLA+ 1.75mm Filament which has given me the best quality prints so far. There are many colours available, and prices are great (Amazon usually has a discount on these).
Software
Design
Thankfully, you can find ready to print files on websites such as Thingiverse and Cults3D - the former being a free website, and the latter offering paid files too.
You can create your own designs with CAD tools such as Tinkercad, Fusion 360 and Solidworks. I use Tinkercad as it's web-based, very easy to use, and it's free! The other two are paid software and have a much steeper learning curve.
Tinkercard has a very ease to use interface, and you can very easily create moderately complex designs.
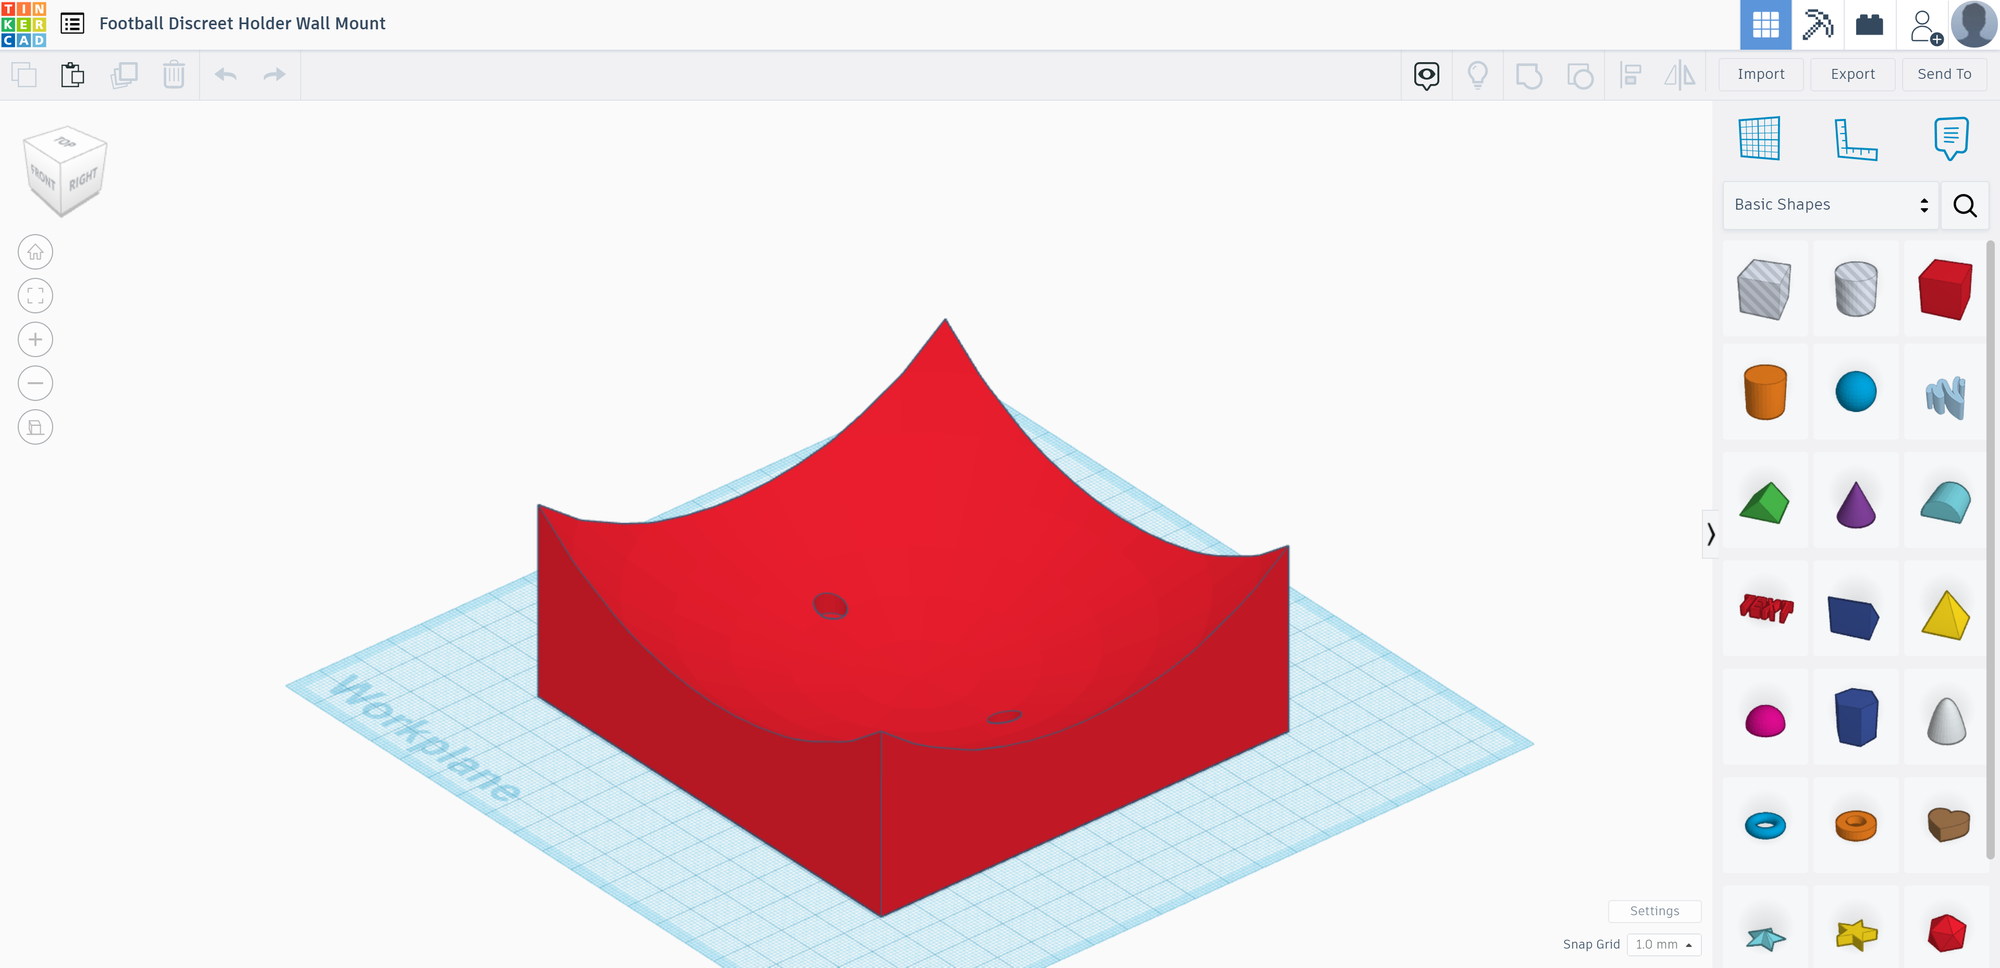
I created this discreet football wall mount for a friend of mine, who was looking for a solution to mount footballs on the wall without the mount being visible. This mount has two holes which you can screw into the wall, and then use double sided tape to secure the football into the curve. The curve accommodates a size 5 football (approximately a 22cm/220mm diameter).
I was able to achieve this design by placing a 120mm x 120mm x 75mm cube in the middle, and then placing a 220mm sphere on top, lowering it a bit and making it a hole rather than a solid object. When you select two or more items and group them, anything that's a hole will be removed from other objects it overlaps.
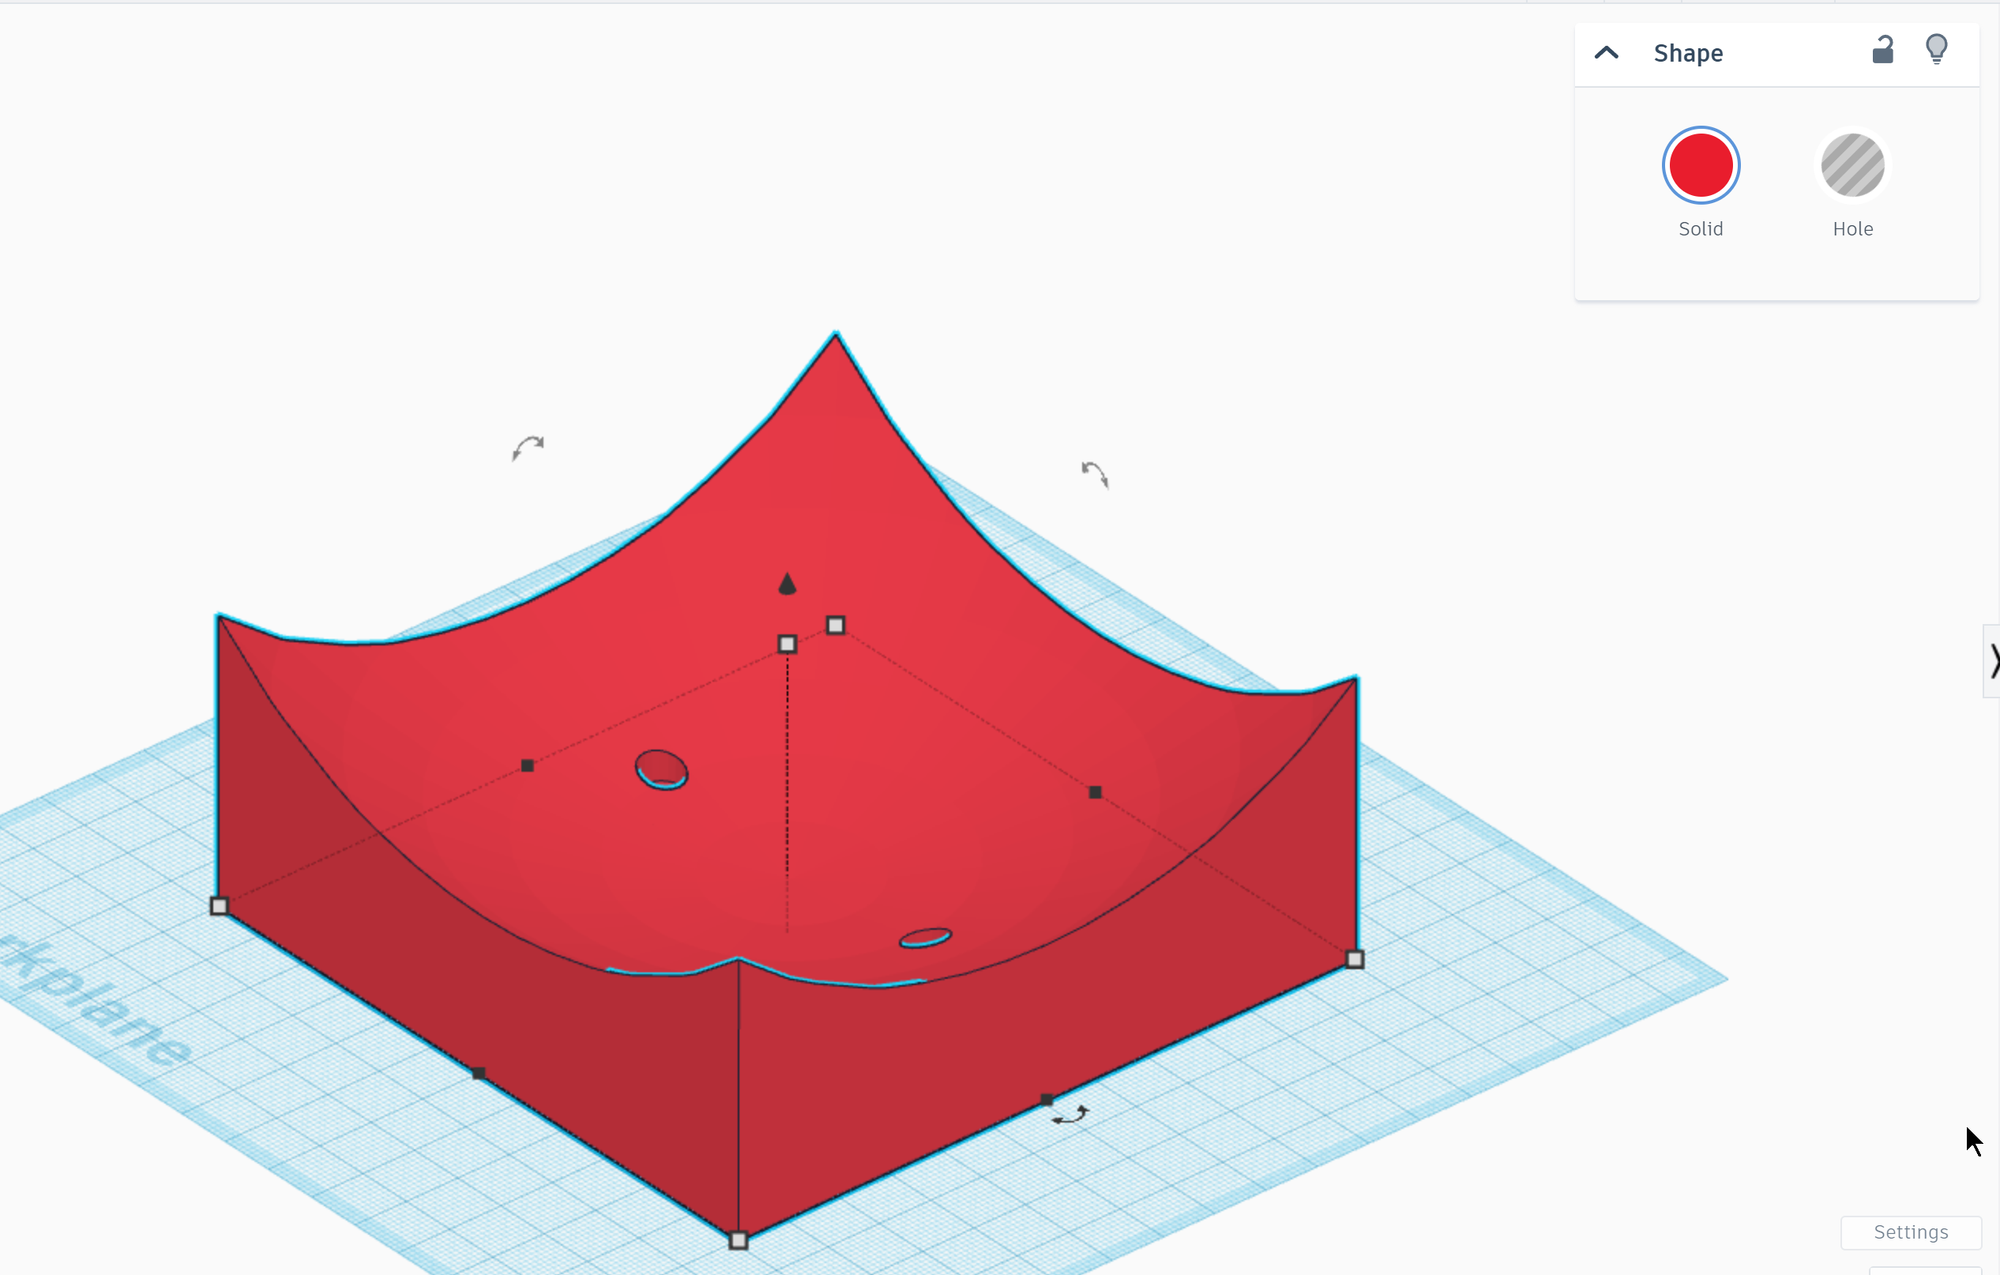
The result was this nice curve in the cube.
Slicer
You need a slicer - this essentially takes an STL (Stereo Lithography) file and converts it to Gcode which is what the printer needs to print each layer. You can adjust settings such as print quality, layer heights, wall line count, etc. It takes some tinkering to find the best settings.
- Ultimaker Cura (free)
- PrusaSlicer (free)
- Simplify3D (paid)
Personally I use Ultimaker Cura, and it's been great so far - lots of settings and profiles that can be saved and tweaked, it's a commonly used software so there is community support available. Simplify3D is also supposed to be great with some advanced features although it is a paid software.